Pages

Saturday, July 13, 2013

All Star Party - Doodlebug Design Party Ensembles

Designer Note: I just love doing party ensembles! One thing that always draws me to Doodlebug Design products is that EVERYTHING is coordinated - from the darling papers and embellishments - to the bakers twine and stickers. This makes making a party ensemble a no brainer! I decided to focus on doing a cute party that would be perfect for that little (or big) boy in your life. I call this an "All Star" party and decided to focus on all the star motifs in the Stars and Stripes line.

 In my ensemble you will find a centerpiece with banners and ribbon medals on paper straws. These were all cut using my Silhouette Cameo:
Pennant
3 Circles

Next is this awesome cupcake holder that I like to call a cupcake "throne". This was done with my Scor-pal.

Next up is a fun and festive little party hat with some tissue paper fringe, and a bakers twine string that goes around the neck to hold it on. This was made on the Silhouette Cameo.
Party Hat


You can't have a party with out the invitations! This slide out invitation was also cut out on the Silhouette Cameo.
3 invitation card kit

And finally, send your party guests home with a little treat holder to say thank you for coming! These were made with my Scor-pal tool.


Here is the whole set all laid out. This would be great for a sport theme party or any other type of festivity that you want to show that special boy in your life that you think the are an "All Star"! Thanks for stopping by today!


Tuesday, July 9, 2013

Scor-pal and Clearsnap

Hi there! Tya here with my take on the swap that we got to participate in with Clearsnap. I have always loved the rich, vibrant inks and mists that Clearsnap has so I was very happy to be able to use some of their amazing products on my project. Here is what I did:
This is my take on a 2-4-6-8 box. It is the same general technique, but I wanted a taller and wider box,so I changed the dimensions up a little bit to make this tall, open topped box that I used to give a gift of some yummy Bath and Body Works Body Spray. The box fit perfect. I also love using my stamps to make my own customized tissue paper, so I used a flower stamp and the beautiful Mixed Media Ink Chox to make the fun flowered tissue paper. Here is what I used and how to make one of your own:

 Supplies:
9x12 inch white cardstock
(4) 2 1/4 x 6 1/4 pattern paper (My Minds Eye Kate&Co.)
cut out sheet of journaling spots and card sentiments and stickers from Kate and Co. line as well for tag
(2) 1 1/2 x 12 inch teal cardstock
border punch
pop dots
Stamp by Judikins - Mod Mum
1 sheet of white tissue paper
Various embellishments, bakers twine, ribbon, pin and jewels

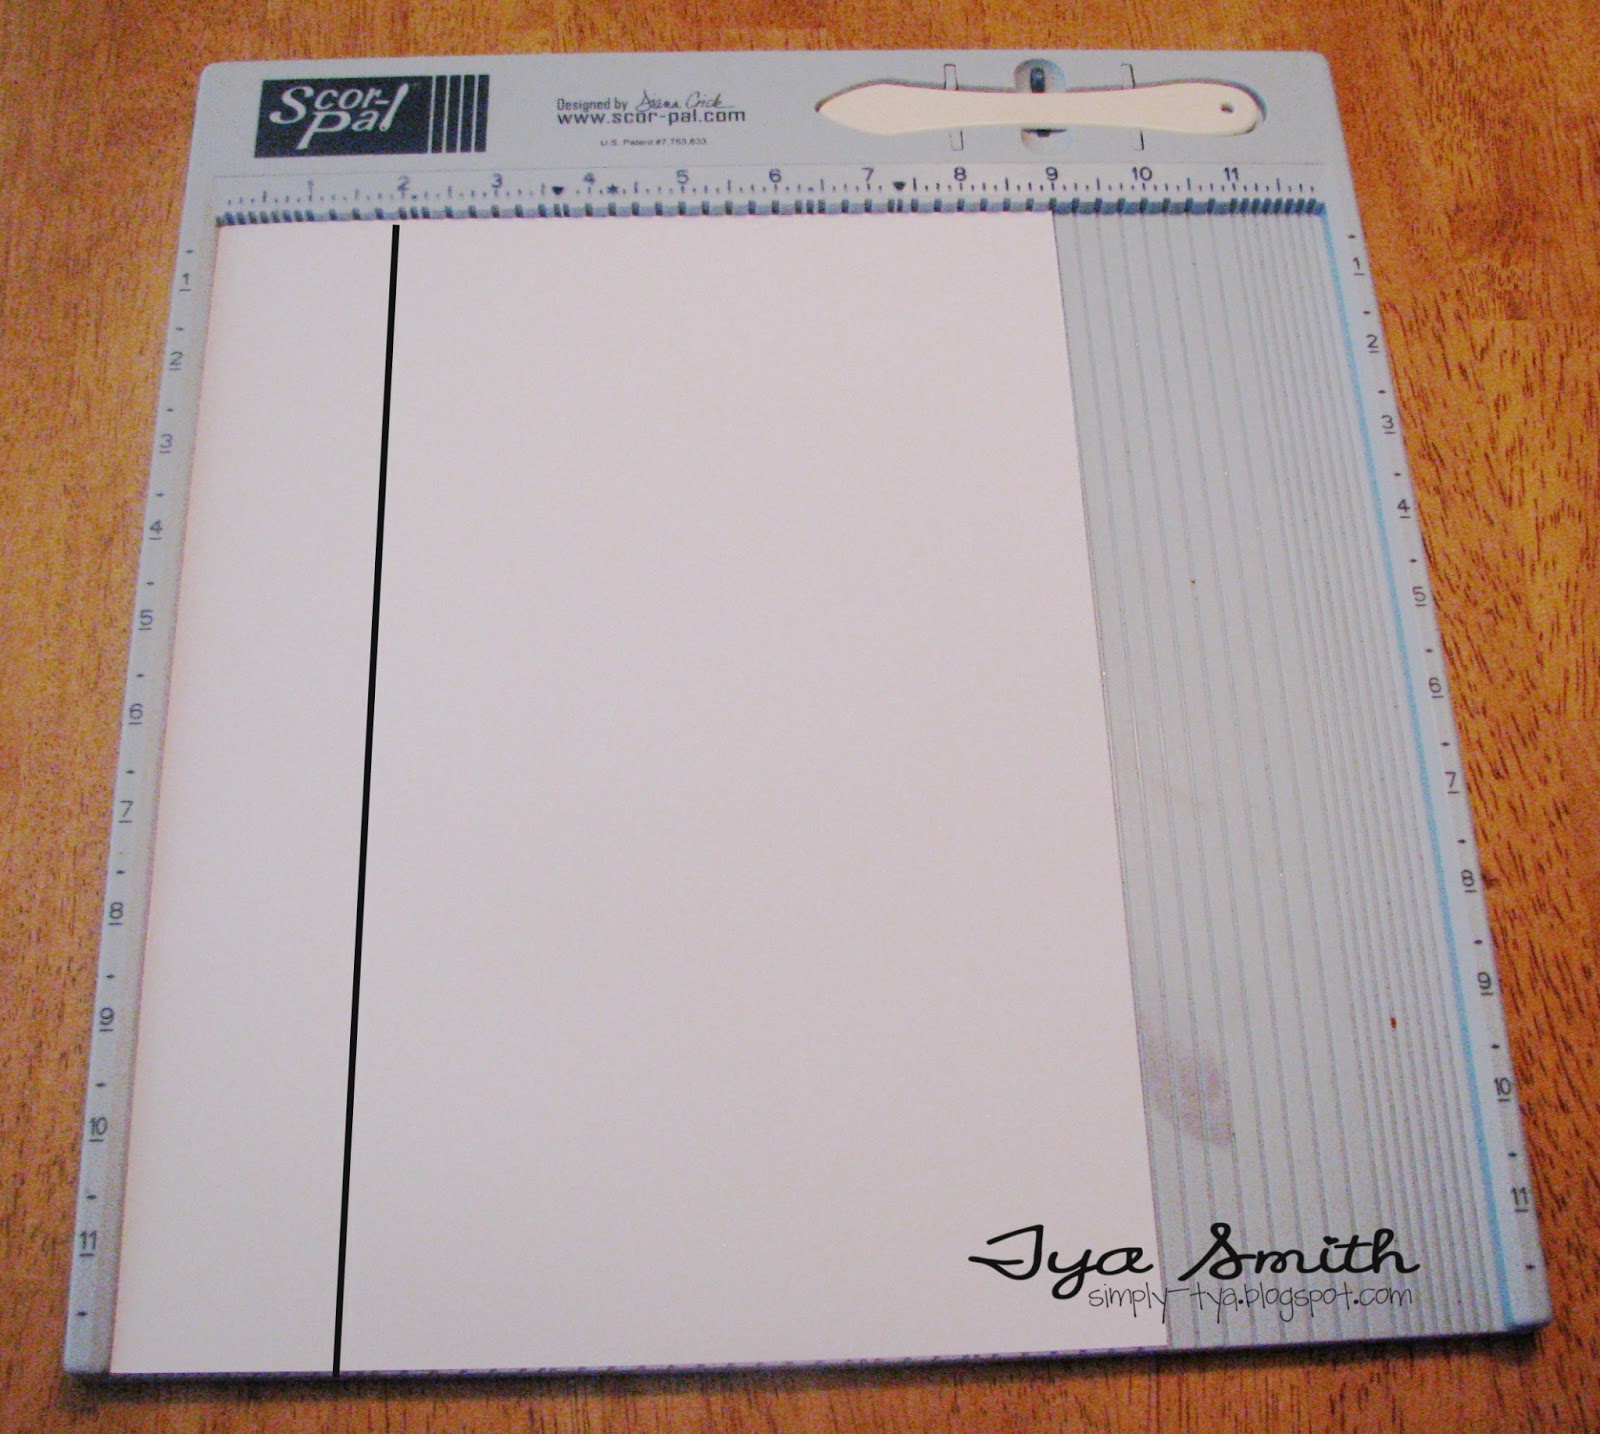
Step 1- On the 9 inch side of the 9x12 inch white cardstock, score the paper at 2 inches.
 Step 2 - Score on the 12 inch side of the cardstock at 2 1/2, 5 , 7 1/2, and 10 inches. Trim away the bottom right section as shown.
 Step 3- Snip the bottom sections up to the bottom scored line as shown:
 Step 4- Fold all the scored lines:
 Step 5- Add Scor Tape to the far right panel and to 3 of the bottom panels as shown:
 Step 6- Glue the box together:
 Step 7- Decorate the outside panels of the box using the (4) 2 1/4 x 6 1/4 pattern papers. Take the (2) 1/12 x 12 inch teal cardstock strips and punch a border using a border punch. Score these papers at 2 1/2, 5, 7 1/2 and 10 inches just like the panels for the box. Add these to the top and bottom edges of the box.
 To make the tag, use one of the journaling spots , stickers and various embellishments. Add the tag to the front of the box using pop dots.
 To make the tissue paper, I simply stamped a flower stamp with the Chox and then used the Smooch Spritz as well for some added fun :)

Thank you for letting me share my project with you and thanks to Clearsnap for designing such fun products for us to use! It was a lot of fun!


Thursday, June 27, 2013

Scor -pal and Heartfelt Creations Week

Hi there! Tya here with my take on a fun swap I was able to take part of with Scor-pal and Heartfelt Creations. I got to use some cute stamps and die cuts to make a fun beach bag with 3-d flowers on the front that are stamped and cut using the metal dies I was given. I was inspired by this bag here Let me show you what I did!

BEACH BOX IN A BAG
Supplies:
Papers are Pebbles Inc. Party Line  -you will need a 6x 10 piece and a 6 x 8 piece 
Cardstock in magenta cut to 4 x8  and teal (2) 1 1/2 x 8 1/2 inch pieces
1 yd. Yellow ribbon
Border punch
Yellow Ink
Bright Pink Ink

 Step 1- Take an 4x8 inch piece of cardstock and score it at 1 inch on each side
 Step 2-Snip the edges as shown
 Step 3-Add scor tape to the 4 corners as shown
 Step 4-Tape the box together as shown. This is the box that will go on the inside of the bag
 Step 5- Cut a piece of pattern paper to 6 x 10. Add scor tape to the bottom edge of the paper
Step 6- Remove the backing from the scor tape and add the box to the center of the paper
Step 7- Wrap the pattern paper around the box as shown
Step 8- Take the 6 x 8 inch piece of pattern paper and add scor tape to the bottom and sides of the paper. Remove the backing of the scor tape. Add this paper to the front section of the box. Attach the paper to the sides as well making the bag shape.


This is what the bag looks like from the inside
Step 9- Add scor tape to one end of the yard of ribbon making it one big loop. Add scor tape to the center of the ribbon as shown
Step 10- Place the bag onto the ribbon, centering it.
Step 11- Glue the ribbon up on the front and back of the bag.
Step 12- On the  (2) 1 1/2 x 8 1/2 pieces of cardstock, punch out a border using a border punch. Add these to papers to the front and back of the bag.
Step 13 - I die cut 1 large and 2 small flowers from the dies. I stamped in Yellow and Pink inks to make the flowers. Add the Sparklets onto the flower centers. 
Thanks for joining me and thanks to Heartfelt Creations for designing such fun and beautiful stamps and dies to work with! 

Thursday, May 30, 2013

Scor-pal and Paper Smooches

Hi there - Tya here with my take on the fun swap that we got to participate in with Paper Smooches. They absolutely have the cutest, most whimsical stamps out there that are totally right up my alley!
I got to use the new stamps set called Think Fast. It featured lots of darling food shapes. I decided to make a fun little gift card holder/card to give to your special someone when you need a  lunch date! I was inspired by a pin that I had on Pinterest, like this one  here, I just changed the measurements and made it a single pocket instead of a double. Here's how I made it:
Greeting Card with Gift Card Holder Pocket

Supplies:
Think Fast stamp set by Paper Smooches
6x6 paper pad from My Minds Eye Collectable papers
Buttons
Twine
 6 x 11 Red cardstock 
Kraft cardstock 3 1/2 x 4 1/4 and 3 x 5 1/2
Scallop border punch

Step 1- On the 11 inch side of the red cardstock, make score marks at the Triangles on the Scor-pal. (these are the marks you would use to make a brochure fold)


Step 2- On the 6 inch side, score at 1 1/2 and 3 inches.

Step 3- Trim away the bottom and middle sections as shown. NOTE: its ok if you have score marks left on the sections showing. This is just meant to be a card base and you will eventually cover these with other papers.


Step 4-
Now you will choose 3 different pattern papers to cover the card base.

These measure 3 1/2 x 5 3/4 (stripe), 3 1/2 x 4 1/4  (green dot), 3 1/2 x 2 3/4 (yellow)

Add these layers to the card as shown:

Step 5- Add Scor tape as shown to make the front pocket:


Step 6- Decorate the card as shown:
Banner is 1 x 3 inches, Kraft cardstock on left side is 3 1/2 x 4 1/4, Kraft cardstock on right side is 
3 x 5 1/2, white cardstock is 2 1/2 x 4 1/4. Add  sentiment  and soda cup stamp. Add button and twine.

Kraft paper border strip 1 x 3 1/2 - used a scallop border punch. Red cardstock is 2 1/2 x 2 1/2, Red stripe paper is 2 x 2. Add sandwich stamp and buttons.

Thanks for joining me!