Pages

Thursday, September 7, 2023

"Life is Beautiful - 4x4 Mini Album -Doodlebug Design DT project - Hello Again Collection

I have always loved making mini albums - although I don't design them very often as of late. When I saw the 'Hello Again" collection - I knew that I needed to pull out my mini album supplies again and get to work! This time I decided to make an album on the smaller side than I normally do, and I have to say - I think I have fallen in love with it! This album is made using a 4x4 inch binder and I had the MOST fun filling it up with more goodies from the "Hello Again" collection!


As you can see- I decorated the front with lots of pattern papers, die cuts, and Bling! On the side, I was able to use a bit of the Gold Dot Acetate and the Just Charming Clip to make a cute slip-in for the bookplate.  I also added the "Memories" sticker to the acetate.


Next the fun part! Decorating the inside! Many of the pages of my album were made by hand and then I glued them to a white paper tab cut file that I found that fit this size album. It made the pages so much easier to turn that way! And lots of Odds and Ends, and enamel shapes were used to decorate this first page! 
 
The album also came with a few page protectors. These were fun to use to make some fun interactive pages for my album. Isn't this happy sun from the "Hello Again" 3x4 card cut apart paper so cute? This flap lifts up to reveal more spots to add photos.

I was able to layer up my pages with many of the die cuts from the collection! I also was able to add a few of the fun Puffy Stickers in as well! I love those little guys! You can see a small peek of the envelope page I made on the right-hand side using my envelope-making tool to add another custom page to the album! The possibilities are endless! 


The 4x4-sized cards on the Patchwork Plaid cut-apart paper were the perfect size for an album like this as you can see on the left-hand side page. I also cut one of the tags from the Just Because paper and added it right to one of the rings of the album for some variety! 


Another flip-out page here opens up to reveal more space for photos. Isn't the rainbow on this card so fun! I layered one of the rainbows in the Odds and Ends right over the top of the rainbow already on the card with some foam tape for dimension! 

On the right-hand side of the page- you will see yet again another custom shape I added to the album. I just took a circle die cut that is cut in half and added it to my page tab. I then was able to add a photo mat that was hanging off the edge of the page for some fun variety. How lovely is that gold foil tag from the Bits and Pieces? It was the perfect size for this page! 


Here is the other side of that half-circle page. As you can see, a 2x2 size photo would be adorable in this spot! On the right side, I made a pocket card layered with one of the stickers from the This and That sticker sheet! I added a gold foil tab to one of the 4x4 cut-apart cards, and this piece pulls out from the pocket for more photo or journaling space! 


Here is the other side of the pocket card and the last page of the album. The florals in the collection just HAD to be the focal point of one of my pages! Why not end on this lovely spray of florals from the Bits and Pieces! 


A full video walkthrough of this album can be found here over on my YouTube channel! I had an absolute ball creating this little cutie and I hope I have inspired you to make a mini album of this size and fill it up with all of those "Life is Beautiful" memories and photos that you have! Thanks for stopping by today - Happy Crafting Friends! 


DOODLEBUG PRODUCTS USED
Hello Again collection
Hello Again 12x12 Textured Cardstock
Hello Again  Petite Prints 
Hello Again Gold Dot Acetate
Hello Again Just Charming Clip and Keychain

OTHER
4x4 D Ring Album


Monday, August 28, 2023

It has been so fun to get to be designing for Doodlebug again after my little hiatus. One of the things I love most is creating gift sets that I can use when I need them using my Doodlebug products and my trusty Silhouette Cameo!  A match made in heaven for sure! I have a fun bag and a cute fun-fold card to share with you today all made using the amazing 'Hello Again" collection!

Let's look at each of the pieces up close! This adorable bag caught my eye because I had an identical one back in the day! You know the kind- made of plastic - just like my awesome jelly shoes! I knew it would be such a fun design to use to hold fun little gifts for someone special. The bag is cut out using a piece of the Bubblegum Textured cardstock found in the Hello Again Textured Cardstock pack.  I used the Perforated Bag cut file (Design ID 446515) and cut it on my Silhouette. 

I added the "For You" tag from the "Just Because" tag paper. I tied it to the back with some Beetle Black Chunky Twine. I also added a few butterflies from the "All Aflutter" Shape Sprinkles to the tag for some shine with the beautiful gold foil on the butterflies.

This fun card was also cut out on my Silhouette. I am such a huge fan of fun fold cards and I fell in love with this fun one. It is the French Door Easel Card Birthday Balloons cut file ( Design ID 401737). I made the card base out of the Beetle Black Textured cardstock. I then added a few pieces cut out from the fun "Forever Flowers "paper. I omitted the birthday balloons on the cut file, and instead, added the "Thinking of You" cut-apart cards from the "Hello Again" paper. 


I  then layered the card up with the "Butterfly Bouquet" Doodlepop. This was such a great dimensional element to my card front that really makes a statement! 


The inside of the card needed some decorating, so I added a small strip of the  "Forever Flowers" paper and added the "Love You" circle die cut from the Chit Chat, along with the small yellow flower that was on the Doodlepop.


 I had so much fun creating this little gift set! I hope I have inspired you to make one of these to give to your special someone in your life! The 'Hello Again" collection has so many fun products that take your gift-giving packaging that little something extra that says just how much they mean to you! Thank you so much for stopping by today! Happy Crafting Friends! 


DOODLEBUG PRODUCTS USED
Hello Again collection
Hello Again 12x12 Textured Cardstock
Beetle Black Chunky Twine

OTHER
Silhouette Cameo


Sunday, August 13, 2023

Just Be You! - Hello Again - Doodlebug DT project

 Looking for a fun way to add lots of embellishments to your layouts? Try making a circle grid layout!

I am back today sharing another layout featuring the simply lovely "Hello Again" collection! I have mentioned before that Doodlebug really knows how to do embellishments right!! The array that is offered makes creating layouts so much fun because of the endless possibilities! You can mix and match all different types of embellishments! I am showcasing this design type here with my layout today


To create this layout I started with the Black Floral side of the Cute Calico paper. I then took an 11 3/4 x 11 3/4 inch piece of white cardstock and cut 9 circles out of the paper using my Silhouette. The circles measure 3.75 inches. 

Next, I selected 6 different pattern papers from the 6x6 paper pad and cut them to a little bit under 4x4 inches each. I then chose my 3 photos. I arranged my photos and pattern papers in the order I wanted to and then glued them to the background paper. I then added foam tape to the back of the white cardstock paper with all the circles cut out of it on top of the photos and pattern paper. 

And then the fun part- decorating each of the circles!

I loved the "Just Be You" cut out from the Chit Chat ephemera so that became my title. It fits perfectly with these fun pics of my daughter playing at the park.


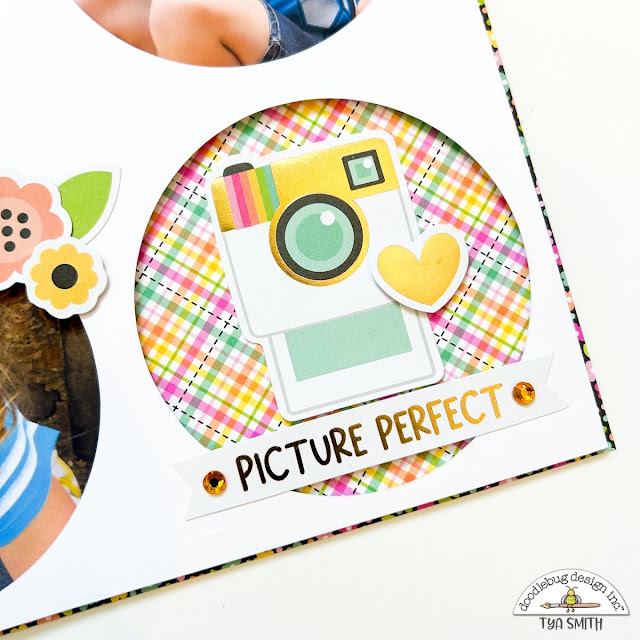
As you can see, I used lots of layers of different embellishments. I mostly stuck to the Odds and Ends for the bigger pieces and then added other pieces to accent. Here is a cute Polaroid-style camera with a fun sentiment from the Chit Chat. 


Here on the top circle,  I used a cute yellow check circle label from the Bits and Pieces. I added some foam tape behind 2 beautiful butterflies from the Odds and Ends. I also added a sprinkle of the stunning Mini Jewels for some sparkle and shine. 
The bottom circle features this cute hanger cut out from the Odds and Ends. I want one of these in real life! Too cute!


It wouldn't be a Doodlebug layout without a rainbow on there somewhere - so I added the rainbow, sun, and clouds to this circle.  All of these are from the Odds and Ends. Look how cute the little jewel sits on that cloud!  I also added a cute phrase sticker to my photo on the bottom circle. This time I used the This and That cardstock sticker sheet. 


And as a lover of all things floral - I had to add some flowers from the Bits and Pieces here and there on the layout. This cluster fits great at the bottom edge of one of my photos! 


Here's one more look at this fun page. I love how it all came together in the end! 


Thank you so much for stopping by today! I hope I have inspired you to give a circle grid layout a try! 
Happy Crafting friends! 


DOODLEBUG PRODUCTS USED
Hello Again collection

OTHER
Silhouette Cameo
White Cardstock


Friday, August 11, 2023

You Make Me Smile Layout - Hello Again - Doodlebug DT project

 Well -  Hello ...again! LOL! My name is Tya Smith and I am so thrilled to be working with Doodlebug once again! I am so excited to jump right in with my first project using the simply adorable "Hello Again" collection! I loved the first "Hello" collection so much and fell instantly in love with this latest collection. I was so excited to use some fresh, new patterns and colors and all that gold foil is so beautiful! 

I thought it would be fun to create a layout to highlight a wonderful night out with some fantastic food and friends! Any time I am with these two ladies, I can't help but laugh and smile all night! Hi Cynthea and Tonya! 

To create this layout, I started with a white cardstock background and add a few paint splatters in the top and bottom corners of the paper. I love using a little bit of mixed media to add interest to my layouts.  I also base my layout on a sketch from the super-talented Allison Davis - love her work! 


I started to create this layout by grabbing the 6x6 paper pad and chose 8 of my favorite papers.  I cut them to 5 inches x 5 inches. I then cut these squares right in half with my trimmer. I added some hand stitching on the solid papers for some added texture and to make the papers stand out a little bit. I then added these papers to the center of the cardstock base. I typed up my journaling on white cardstock strips and glued them to this section of the layout.


Next up, is the fun part! Using all the embellishments! I added some floral clusters and tiny gold foil flowers from the Bits and Pieces. Then  I added 2 butterflies to the flowers with some foam tape and folded up the wings for some interest. The butterflies are from the Odds& Ends. 
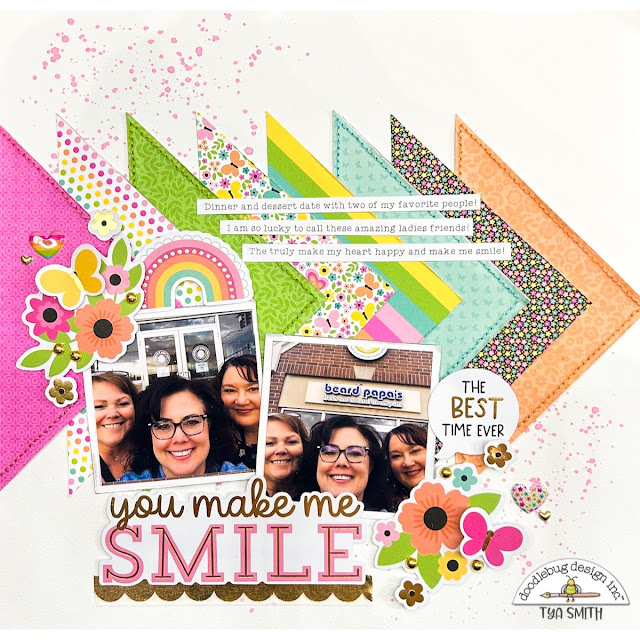

I  was so excited to see these awesome new gold foiled Sprinkles as part of this collection so  I  added them to the floral clusters. I had to add a cute rainbow from the  Odds & Ends to the top edge of one of my photos. Then I finished decorating with some Hearts from the Puffy Icons. It's so fun to add all these different types and textures of embellishments to make my clusters really stand out! And let's be honest, nobody does embellishments better than Doodlebug! 


I added the "You Make Me Smile" die cut from the Chit Chat ephemera to use as my title and because this girl can't get enough of gold - I added a strip of gold scallop washi tape under the title. I also added the " The best time ever" speech bubble to the right side of my photo.
Thank you for stopping by the blog today! I hope this layout inspires you to record some of your favorite memories of those people in your life that make YOU smile! Happy Crafting friends! 


                                                   INSTAGRAM | YOUTUBE | BLOG


DOODLEBUG PRODUCTS USED
Hello Again Collection
Gold Foil Sprinkles

OTHER
Pink Ink for splatters
Embroidery Thread
Needle


Sunday, July 23, 2023

Here+ There Cards - Simple Stories Design Team Project

 Hello there Simple Stories fans! I am up on the Simple Stories blog today sharing my latest batch of handmade cards! This time around I was so lucky to get to play with the awesome Here+Now collection. I had so much fun using all the travel-themed products to make some gift card holders that would be perfect for anyone who Is going on a trip and you would like to give them a little fun money – or maybe a card for a recent graduate wishing them success in “Oh The Places You’ll Go!”. Either way, I hope these cards will inspire you to create something fun!


The thing that spurred my idea to create gift card holders was I found these cute little kraft-colored mini bags that measure 4 x 2 ½ inches. I thought they would make a really fun way to add a gift card to a card front so, I took the bags and layer them out in various orientations on my card fronts and started layering the cards up with all the incredible papers, ephemera, and other goodies from the Here + Now collection.

Here are each of the cards up close:

I loved the bold “Journey” title on this card. This was made using some stickers from the sticker sheet.  I also used one of the mini tags from the Journal Bits and Pieces. I used some twine to tie it around the mini bag. I then layered it up with a few other Bits and Pieces and some cute flowers with enamel dot centers.

This fun card features a spray of the beautiful florals that are found in the Floral Bits and Pieces. I added a button tied with twine to the flower center for some dimension. I added some foam stickers and a few other stickers to decorate the card.


I thought this card was so fun with the little bag right smack in the middle of the card and then tucked a few Bits and Pieces behind the bag. The awesome globe on the card is from the Chipboard Stickers.


This cute open suitcase die cut from the Bits and Pieces Ephemera is a great base for this sticker sentiment from the Sticker Sheet. I love how the mustard dot paper from the 6x8 paper pad matched this sticker so well!


I absolutely adore the Tag Element paper that comes in the collection. I added one of the Decorative Brads with some twine to the top of the tag. A few more Chipboard Stickers added to the card make this one full of dimension and fun!


More die cuts from the Bits and Pieces and Journal Bits and Pieces were used to make this adorable cluster of elements on the card front. A floral foam sticker added to the card along with another button and twine makes this card super fun!


What goes better together than an awesome cloud pattern paper and an airplane die cut! This card was so fun to layer up. I even added a tag from the Journal Bits and Pieces to the little bag! What a fun card!


Our last card features 3 of the gorgeous patterned papers found in the 6x8 paper pad. Love that stripe! Layered with a cab, florals, and a couple of labels, this card is full of travel goodness!


These cards were so fun to make and have me so excited to have them on hand to give to all those with wanderlust like me! This collection has me wanting to book a plane ticket to somewhere exotic for sure! I hope I have inspired you today to pick up the Here Now collection and create some travel-themed cards for your own! Thank you for stopping by today! Happy crafting friends!

SUPPLIES USED:

HERE + THERE COLLECTION KIT

HERE+ THERE CARDSTOCK STICKERS

HERE + THERE 6X8 PAPER PAD

HERE + THERE CHIPBOARD STICKER

HERE + THERE BITS AND PIECES

HERE + THERE JOURNAL BITS AND PIECES

HERE+ THERE FLORAL BITS AND PIECES

HERE + THERE FOAM STICKERS

HERE + THERE DECORATIVE BRADS

HERE + THERE ENAMEL DOTS

HERE + THERE WASHI TAPE

Thursday, April 6, 2023

Retro Summer Cards- Simple Stories Design Team Project

 Hi there everyone! Welcome! Today I've got 6 cute cards to share with you! I used the awesome "Retro  Summer" collection from Simple Stories to create these - and can I just say how much I LOVED working with this bright and cheery collection? Wow- I am so ready for Summer now! (And I want Ice Cream!)

Here are the cards I made:


Let's get some close-ups of each of the cards, shall we? And I've also included my measurements and the supplies I used to create each of the cards so if you'd like to recreate these- you'll know what I used!


Beach

4 1/4 x 5 1/2" white cardstock for card base
4 1/4 x 5 1/2" White Dot 6x8 Paper pad
3 x 4 1/4 " Aqua grid 6x8 Paper pad
Beach card- Retro Sign Bits and Pieces
Sunburst Card- Journal Bits and Pieces
Sun- Foam Stickers
Beach word- Bits and Pieces
Beach chairs- Bits and Pieces
Beach Bag- Foam Stickers
Towel- Sticker Sheet
Dot banner- Bits and Pieces
Button and Twine
Lights - Bits and Pieces


Delicious

4 1/4 x 5 1/2" white cardstock for card base
4x4 Robins Egg Color Vibe cardstock
4 1/4 x 5 1/2 " Brown Sprinkle 6x8 Paper pad
Die Cut a circle 1/2 from top
Make Shaker element using foam tape, acetate and fill with colored sequins
Large Ice Cream Cone- Journal Bits and Pieces
1 1/2 x 4 1/4" Cream Color Vibe cardstock
Delicious banner- Bits and Pieces
$3- Ephemera Bits and Pieces
Button and Twine
Pom-Pom Ribbon


Poolside

4 1/4 x 5 1/2" white cardstock for card base
4 1/4 x 5 1/2 " Water paper 6x8 Paper pad
3 3/4 x 5 1/4" Bubblegum Color Vibe cardstock
3 1/2x 5 " Colored Lines 6x8 Paper pad
Community Pool Sign- Retro Sign Ephemera
Pool Ring- Bits and Pieces
Swimsuit- Chipboard Stickers
Snorkel- Bits and Pieces
Beach Ball- Bits and Pieces
Heart- Sticker Sheet
Poolside- Journal Bits and Pieces
Button and Twine
Pink Enamel Dot


Rad

4 1/4 x 5 1/2" white cardstock for card base
4 1/4 x 5 1/2 " Cream Color Vibe cardstock
2 x 5 1/2 " Green Stripe/ Pink Dot 6x8 Paper pad
Twine
Brown Tag- Tag Elements paper
Pink Swirl label- Journal Bits and Pieces
Rad- Journal Bits and Pieces
Sunglasses- Foam Stickers
Van- Bits and Pieces
Sun Brad- Decorative Brads
3 Green Enamel Dots
Pom-Pom Ribbon


I Scream, You Scream

4 1/4 x 5 1/2" white cardstock for card base
4 x 5 1/4 " Pink Pattern 6x8 Paper pad
3x4 Sunbursts - 3x4 Element Paper
Cream Chipboard Frame- Chipboard Frames
Ice Cream Cart- Bits and  Pieces
I Scream,  You Scream- Sticker Sheet
Pink Popsicle - Chipboard Sticker
$2- Journal Bits and Pieces
2 Pink Enamel Dots
Button and Twine


Summer

4 1/4 x 5 1/2" white cardstock for card base
4 1/4 x 5 1/2" Multi -Colored Squares 6x8 Paper pad
4 x 5 1/2 " Pool card- 4x6 Elements paper
Pool Float- Bits and Pieces
"Summer" - Foam Sticker
Pool Noodle- Sticker Sheet
3 Brads- Decorative Brads
Fun in the Sun- Sticker Sheet
Twine

That's all I've got to share with you today! I hope I have given you some inspiration and you will grab up this fun and festive Summer themed collection and make some super fun cards! Happy Crafting friends! Thanks for stopping by!