Hello there - I hope you all had a wonderful Christmas and wish you and yours well for the upcoming new year! Sooo - now that Christmas has passed, it's the perfect time to dive into all of those festive photos and start preserving those magical memories in scrapbook layouts! For today's post, I'm sharing a fun and festive layout featuring the adorable "Tinsel Town" collection. As you can see, this cheerful collection is so bright and colorful - it was just a joy to create with!
I base my layout on a favorite photo from my recent trip to Disneyland - because what better way to relive the holiday magic than through a trip to the Happiest Place on Earth? Let's jump into all the details of this project!

I have always wanted to do a layout with a smattering of these 3D stars across it - I have a layout like this pinned to my favorite layout Pinterest board that features this type of embellishing and I knew that with these pretty colors, this would be a great collection and photo to do this embellishing!
 My photo is back with layers of Textured cardstock and the pretty plaid paper on the Festive Floral paper is just the right touch for my photo with lots of colors going on. Since the photo was taken in front of the Christmas tree on Main Street, it seemed right to add a die-cut tree and lights to the layout. These are from the Odds and Ends and cute light strands are from the Bits and Pieces. I also added a few banner strips of pattern papers and Petite Prints from the collection. The silvery mulit -colored dots that I used for my background is the Snow Bright paper and it's perfect!
  The "Merry and Bright" title is from the Chit Chat die cuts and I loved how it perfectly summed up my photo of me with my mom and girls - such a fun memory with them!
  For my stars, I used a metal die and then used some Textured cardstock and Petite Prints to make them. I scored each point and then folded on the lines to make a few of them 3D. It really adds great dimension to the layout I think. I also added some little sparkle stickers from the Puffy Stickers, and some of the Sprinkles on some of the centers. For some added sparkle and shine - I used some Stickles glitter glue to accentuate some of the stars.
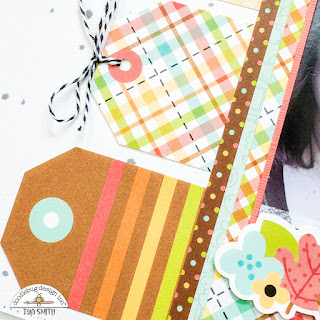
 For my journaling on this layout, I decided to add some hidden journaling tucked behind my photo. I used one of the tags from the Bits and Pieces Ephemera and typed up my journaling and added it to the tag. I topped the tag with some Cupcake Twine and a heart die cut. More sparkle from the Stickles was added here as well. If you find yourself not having a lot of room to journal on your layouts - this technique with the hidden tag is great!
Thank you so much for stopping by the blog today! I hope this layout inspires you to pull out your favorite holiday photos, grab the Tinsel Town collection, and start creating beautiful layouts that beautifully capture your cherished memories. Scrapbooking is such a meaningful way to preserve these moments for future generations to enjoy and connect with. Wishing you all a season filled with joy, creativity, lots of color, and love - Happy Holidays and Happy Scrapping!
DOODLEBUG PRODUCTS USED:
Tinsel Town Collection
Tinsel Town Textured Cardstock
Tinsel Town Petite Prints
Cupcake Doodle Twine
OTHER PRODUCTS USED:
Metal Star Die
Manual Die Cutting Machine
Scoring Tool
Stickles Glitter Glue


