Pages

Thursday, April 18, 2013

Booking it with Scor-pal

Hi there! This is Tya and I wanted to show you the cute mini album that I made using my Scor-pal and the awesome Urban Traveler Line from Simple Stories. I was inspired by this mini album and tweaked the measurements and the theme to make it a travel album. Thank you Dawn for the inspiration!
Suitcase Mini Album

Supplies:
8x12 inch kraft cardstock
(2) 1 x 3 3/4 inch kraft cardstock
2x12 brown dot pattern paper for belly band 
Brown dot pattern paper for handles ( cut on Silhouette) 
(4) 4x7 brown cardstock for mini album pages
2 3/4 x 7 inch grid pattern paper for inside upper flap on suitcase
1 1/2 inch circle punch
(4) copper brads
Twine, and buttons for mini album embellishments
All Pattern Paper and Stickers are from the Urban Traveler line from Simple Stories

Step 1- On the 12 inch side of the 8 x 12 inch kraft cardstock, score the paper at 3 , 3 1/4, 7 3/4 and 8 inches.
 Step 2- Take the (2) 1x 3 3/4 inch kraft cardstock pieces on the 1 inch side score the 2 pieces at 3/8 and 5/8.
Step 3-Round all four corners of the paper. Fold up the paper so that the smaller section is on the top.

Step 4- Using the 1 1/2 circle punch, punch half a circle in the middle of this bottom section.
Step 5-Using the Scor Tape, adhere the 1 x 3 3/4 scored sections to the sides of the middle section of the paper.
Step 6 - Add the grid pattern paper to the top section
Step 7-Decorate the outside of the suitcase. Add the handles and the belly band.Add the tag and stickers to the handle. Just add a little bit of removable adhesive on the belly band so that it can be removed easily.

Step 8 - To make the mini album that goes inside the suitcase, take the (4) 4x7 inch brown cardstock and score each of these papers on the 7 inch side at 1 inch.
Step 9-To bind the mini album, simply take 2 large brads, punch 2 holes and add the brads to the 1 inch scored section of the mini album as shown:

Step 10- Decorate the pages of the mini album.


Happy Scoring!


Friday, April 5, 2013

Doodlebug and Kiwi Lane

Hello everyone! Hope all is well and that you are enjoying Spring! I love this time of year - flowers are blooming, the windows are open and I just want to get outside and enjoy it all!

This week on the blog the Doodlebug Design Team has been featuring products using templates from Kiwi Lane Designs - stop by and check out their site for all the details on this super fun tool that you can use to spice up your layouts! So fun!

I was given the Tiny Shapes templates to work with as well as one that I already had to make the rolling grassy hills along the bottom.  I decided to use the shapes to make this cute 3-D hot air balloon Thank you card.

I used the circle and half of the hexagon templates to make the hot air balloon. To make the 3-D element you simply cut out 4 circles, fold them in half and layer them next to each other to make them pop off the card. Super simple and easy, yet eye catching as well. I also added a few fussy cut clouds on top of the cloud pattern paper background for a little more 3-D fun. I used Doodlebug's new Flower Box line for all of my supplies.


Happy Spring everyone! And thanks for stopping by for a peek!


Doodlebug projects - Stars and Stripes and Take Note

Hey everyone - just wanted to add my 2 projects here that were showcase on the Doodlebug Design blog these past few weeks. We have been highlighting the 4 new lines that Doodlebug release at Winter CHA,. Previously I showed you Flower Box, and Fruit Stand. This time I am showing you the projects that I did for the Stars and Stripes and Take Note lines, which of course are darling as usual!

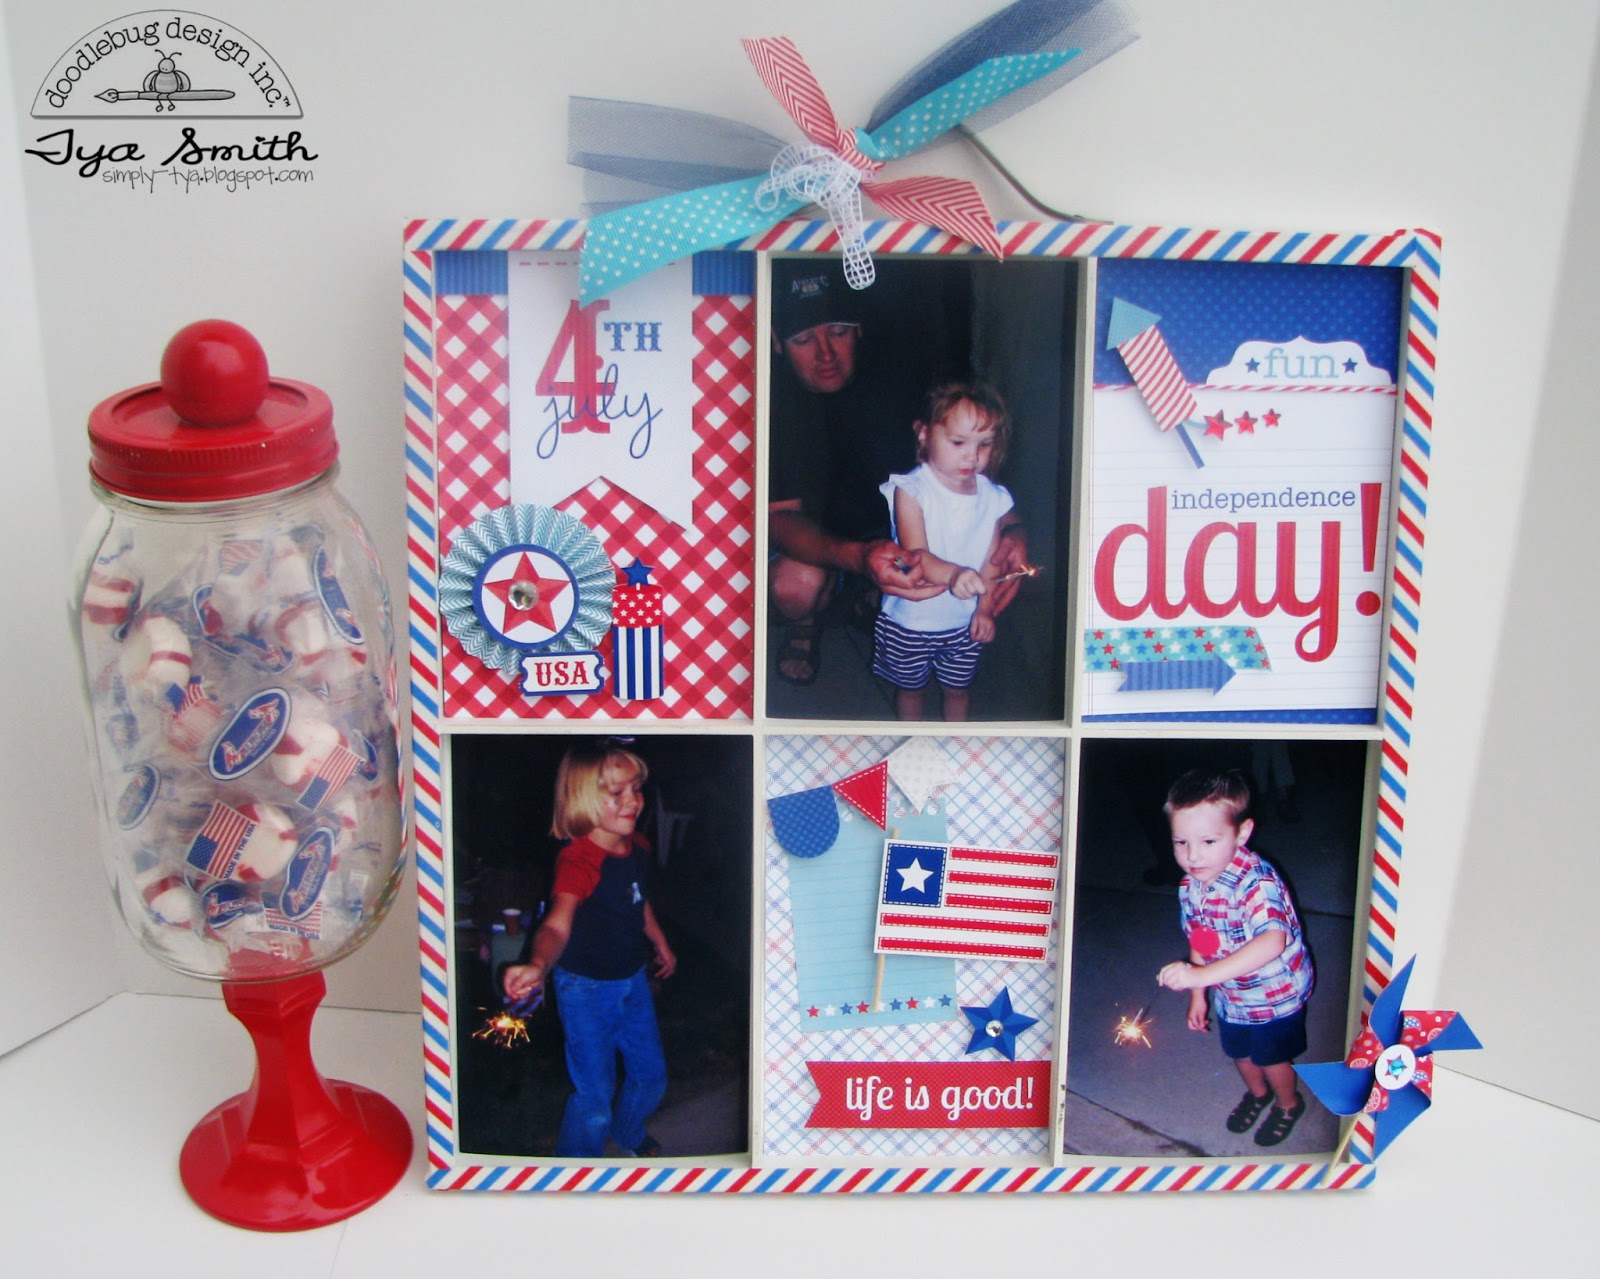
First up is this cute photo tray featuring the Stars and Stripes line. It is one of my very favorite patriotic lines of all time because it has that beautiful pop of teal blue in it that I think just accents the red, white and blues of the line perfectly.
I can't believe how little my kids look in these photos - this was taken a few years ago but I loved the pics of the kids doing sparklers for the first time.


The next project I did was this fun little desk set using Doodlebugs Take Note line and a Silhouette die cut for the holders. My 2 favorite things right now - Doodlebug and my Cameo - love :)


Thanks for stopping by for a visit! Happy Scrapping!


Friday, March 29, 2013

Bunches of Beautiful Boxes - Hanging Treat Box

Hello Scor-Pal Buddies! This month we are sharing with you our favorite "box" type of project. There are soo many wonderful options of boxes that are available to create using the Scor-pal but my favorite type of boxes are ones that hold a little treat. That is why I chose to do a Hanging Treat box. There are many variations of this type of box floating around out there. The boxes can hold anything from fun party supplies to yummy chocolates. I decided to do my box as a flavored water holder that attaches right over the lid of your favorite brand of bottled water. I used Doodlebug Design's new line "Fruit Stand" for my papers and embellishments. Here's how to make it:

Supplies:
3 3/4 x 10  inch cardstock in purple for box base
1 1/2 x 4 inch Stripe paper for box insert
2 x 10 inch Stripe paper for wrap around bottle
1 1/2 x 3 inch green cardstock for box front
1 1/4 x 2 3/4 inch white cardstock for box front ( I embossed mine with an embossing folder)
3/4 x 10 inch green cardstock for rosette on straw
Stickers and embellishments from Doodlebug Design "Fruit Stand" collection
Green straw
Drink Mix and bottled water
1 1/4 inch circle punch to make the hole in the top of the box

Step 1-  On 10 inch side of cardstock score the paper at 3 1/4 , 3 3/4 and 8 inches

Step 2-  On 3 3/4 inch side score the paper at 1/2  and 1 inch.
Rotate the paper around to the other side and score again at 1/2 and 1 inches.
Step 3- Snip away the edges of the paper as shown. Make sure that when you look at your paper that in the middle section you need to be working with the smaller of the 2 middle sections. That needs to be on the top.
Step 4- Add your Scor-Tape to the edges as shown and then fold up the box. Attach the side flaps to the back of the box.


Step 5- Take a 1 1/4 inch circle punch and punch a circle in the upper section of the box as shown.
Step 6- Make a rosette with the green 3/4 x 10 cardstock and attach to the green stripe straw. Embellish front of box as shown. Add drink mix and straw to box. Attach the 2 x 10 inch purple stripe paper wrap around the water bottle.

That's all there is to it! Thanks for joining me and Happy Scoring!


Wednesday, March 13, 2013

Doodlebug Design's New Lines

Good Morning everyone! Just wanted to update the ol' blog here with a couple of new projects I have done using Doodlebug Design's  new lines that debuted at CHA this winter. Doodlebug released 4 new lines all together and they will be showing off the new lines over the next few weeks over on their blog. Stop by each week for some bright and fun new Doodlebug projects that are sure to please.

I have really enjoyed being a part of the Doodlebug Design team this year. Luckily, all of the new lines fit perfectly with my scrapbooking "style" so creating projects and getting ideas has been so easy and fun for me. I feel immensely blessed to be associated with such a wonderful and inspiring company. And EVERYONE on the team and in the company are SO nice and supportive - such a great place to be - so thanks Doodlebug for letting me get to "play" with all of your pretty products :)

First up we have a fun Spring wall hanging featuring the beautiful "Flower Box" line. I used a wooded hanging sign that I painted white and added some fun 3-d elements for some dimension. The birdhouse, the bow and the flower box are all dimensional. They really do "pop" right off the project :)


Next we have a fun little lollipop bouquet featuring the fresh and fruity "Fruit Stand" line. This fun line is perfect for all of those bright and colorful summery projects. Doodlebug has the most darling sentiment stickers with this line that I added to the tops of some fruit shaped lollipops. What a fun way to brighten someones day!


Thanks for stopping by! I appreciate ya! Happy crafting!


Sunday, March 3, 2013

Spring Centerpiece with Scor-Pal

Hello all - I am so happy to be able to share this bright and cheery Spring centerpiece that I made using some beautiful papers from Little Yellow Bicycle Hello Spring Collection and my trusty Scor-Pal! I am hoping that if I put this up, that spring will come that much sooner! :)

Here is how I put this fun project together:

Supplies:
Scor-Pal
All papers, and stickers - Little Yellow Bicycle Hello Spring Collection
Spring Floral Branch(purchased at Hobby Lobby)
Wood Tall Box (purchased at Hobby Lobby)
Paper Shreds
Monofilament for hanging shapes
1 1/8 oval punch
Decorative edge punch
Twine and various ribbons for decoration and embellishment

This project features 3 different elements that I made with my Scor-Pal. The birdhouse, the butterflies and the kites. I will show you how to make each one:

BIRDHOUSES:


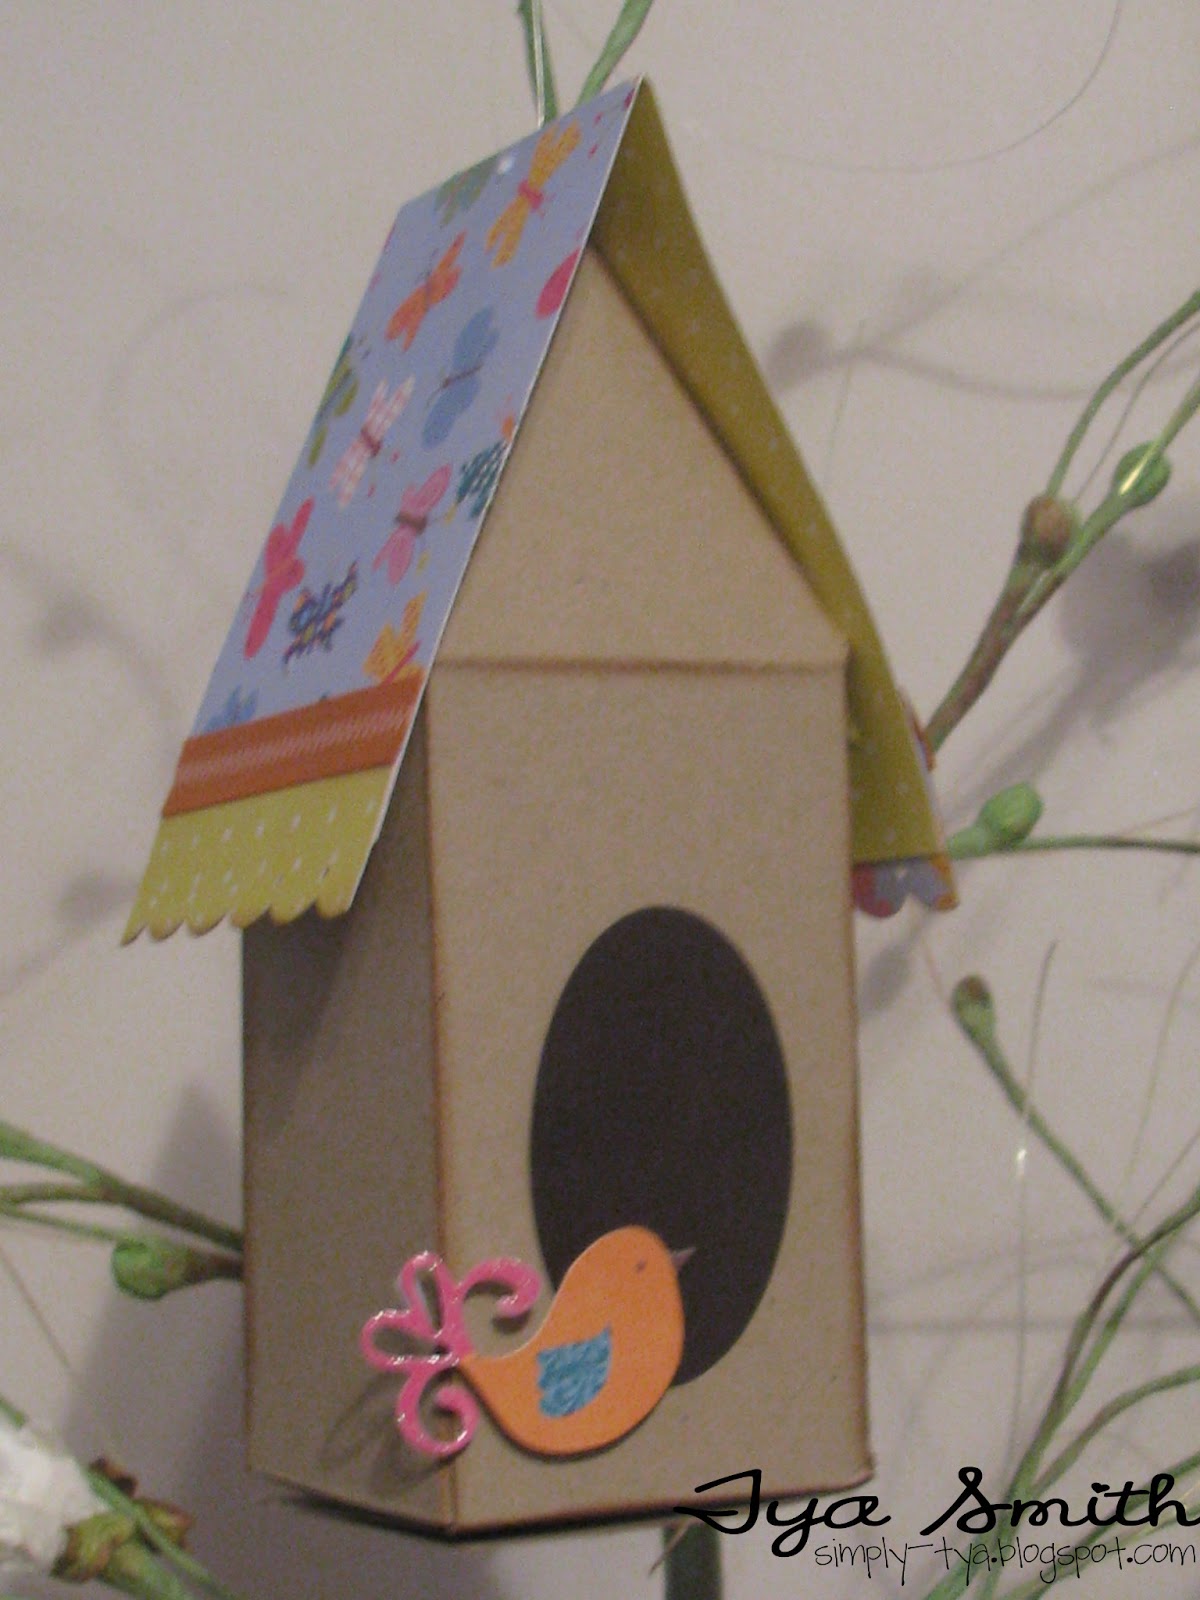
 The birdhouses were made following this tutorial that is found on the Scor-Pal Project Site under Advent Houses. I just did not add a cut out door or window and opted for a Brown Cardstock oval cut from an oval punch for the opening. Decorate the roof edges with a decorative edge punch and some ribbon.

BUTTERFLIES:
To make the butterflies you will need to cut 2 rectangles from either cardstock or pattern paper. The rectangles here are 3 x 3 1/2 inches.  After you cut these out, I just rounded the outside corners with my scissors to make the shapes as shown below.
  Next I lined the shapes up and make score marks every 1/4 inch
 Next - glue the 2 shapes together as shown
Add 2 brown cardstock ovals to the front and the back of the accordion folded shapes. I then added a cute butterfly sticker to the front for some added decoration.

KITES:


To make the kites I took a 3 1/2 x 3 1/2 inch square and scored it right down the middle going both ways:

Next you will simply fold the 2 outer edges to the center line to make a kite shape like below. Glue these 2 edges down.
 Cut some thin strips of coordinating cardstock to the front to make the cross sections of the kite. Attach some baker's twine to the bottom of the kite for the kite's tail and add some tiny ribbon knots onto the baker's twine.


To attach the shapes to the Floral branch, I simply poked a small hole in the top of my shapes and fed the monofilament twine (similar to fishing line) through the hole, tied a knot and added it to the branch.

I hope you will try these cute and fun techniques out for your own Spring Centerpiece. I love that I can add such fun little detalils to my home decor projects using my Scor-Pal! I hope you will too!
Happy Scoring!

Tya :)