Pages

Tuesday, October 15, 2024

 Hello there crafty friends! Who's ready for some Halloween treat holders!?! Treat holders are one of my favorite things to make! I knew I needed to make something with a treat included when I saw all the yumminess of the Hey Pumpkin collection! 

Each of my little treat holders is made from black textured cardstock and are SO easy to make! You can whip these bases up so quickly that you can make a whole batch of these for trick-or-treaters, co-workers, etc. I used this tutorial here to make the holders

After you get the bases all made, then the fun part comes! The decorating!! I turned to the 6x6 Paper Pad to decorate my bags. The cute pattern papers were just the right scale for these smaller bags, and the sheet of mini tags in the paper pad was the perfect size to decorate the front. 

I decorated the tags with some October Sky Sprinkles, Icon Stickers, and some Puffy Stickers

I slid some of my favorite treats into the pocket and then tied the top with some glitter ribbon and some Doodle Twine.

A few more close-ups of the group! 


I had the MOST fun whipping up these little cuties and I hope I have inspired you to grab the Faboolous "Hey Pumpkin" collection and make a batch of these for your favorite little monsters! Have a wonderful day and we will see you all next time! Happy Crafting! 


INSTAGRAM | YOUTUBE | BLOG

DOODLEBUG PRODUCTS USED:

Hey Pumpkin Collection

Doodle Twine

Black Textured Cardstock

OTHER PRODUCTS USED:

Scoring  Tool

Glitter Ribbon

Candy

 Hello, my crafty friends! I am so happy to be able to share my latest design team project with you today! I am so in love with the new "Hey Pumpkin" collection and have so many ideas brewing in my head to make with this cute collection. Today I decided on a 12x12 layout! 

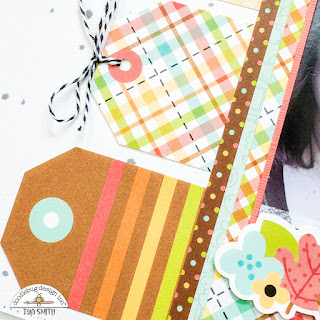
My cute daughter dressed up as a nerd a few years ago and the colors of her costume were the perfect match with the Hey Pumpkin collection so I knew I needed to make a layout! I love how bright and fun the pattern papers are in this collection and I cut out a few 2x2 squares from the 6x6 paper pad and added them in a grid pattern behind my photo block. 

Let's take a closer look at some of the embellishments on the page, shall we?

In this bottom right corner, I made a small cluster of die cuts from the Odds and Ends. There are so many super cute pumpkins and candies that highlight a fun night of trick-or-treating!


The title is from the Chit Chat die cuts. I added a few white enamel dots to the eyes in the "Spooky" title for some dimension. I love how bright and vibrant the colors are in this collection.

I knew when I saw this little ghostie with glasses on that he would be the perfect embellishment to match my photos. I just adore him! I added the "Halloween Spirit" Doodlepop to one of the tags from the Chit Chat die cuts. I tied the top with some Beetle Black Doodle Twine.

To add a little feminine touch to the layout, this gorgeous cluster of florals and a wee little spider add just the perfect touch and go along so well with my bright Bubblegum Textured Cardstock background. A smattering of October Sky Shaped Sprinkles is a fun, shiny touch to this corner.  I also added some Halloween Shape Sprinkles to the center of the flowers. You'll also see a smiley little bat die cut from the Odds and Ends that is repeated throughout the layout.


I loved creating this layout and I hope to have inspired you to get this faboolous collection and use it to record your favorite Halloween memories with the adorable "Hey Pumpkin" collection! Have a great day and we will see you next time! Happy Crafting friends!


DOODLEBUG PRODUCTS USED:
Hey Pumpkin Collection
Hey Pumpkin Textured Cardstock
Beetle Black Doodle Twine


Tuesday, August 27, 2024

Hello there crafty friends! I'm so excited to share my latest design team project with you all today! I love adding personal touches to my home decor and this project does just that! 


I am always looking for fun ways to use the Shadow Box kits in a new and interesting way. I saw this beautiful woodgrain charger plate at my craft store and knew that the circle shape in the middle would be the perfect spot to add the Shadow Box kit!

I also found this beautiful floral pick that matched the Farmers Market collection perfectly so I decided to add a fun tag using some of the elements from the Chit Chat and the Bits and Pieces. I tied some yummy Bon Bon Chunky Twine on the tag to tie in the browns of the collection.

I just love this little sign with the chicken roosting on top! It made for such a cute addition to my tag!


On the right side of the plate, I added a few more die cuts from the ephemera. The beautiful colors on the Sprinkle enamel dots in this collection sure shine through and make a great center for the playful flowers.

The top of the plate needed a little something so this "Harvest Time" banner die cut from the Chit Chat ephemera fit just right! 

I mounted the Shadow Box insert on the vellum included in the kit. I then backed it on some green textured cardstock and then the super cute plaid side of the "Farm Fresh" pattern paper. I added more of the chunky twine around the edge of the circle to add interest and again tie in the luscious browns in the collection.

I had so much fun making this home decor piece that is going to look great with all my other fall-themed decor! I hope I have inspired you today to use our Shadow Box kits outside the box! lol! Charger plates are great spots for these types of projects! Thank you for stopping by and we will see you all next time! 


DOODLEBUG PRODUCTS USED:
Farmers Market Shadow Box Insert Kit
Bon Bon Chunky Twine
Farmers Market Collection
Textured Cardstock

OTHER PRODUCTS USED:
Charger Plate
Floral Pick

Hello there! I am so happy to be sharing a fun scrapbook layout I created for my assignment this month! As an animal lover, the At the Zoo collection has always been one of my favorites that Doodlebug has put out! I was so excited to create !

My cute cousin and her adorable baby had just spent the day at the zoo and their photos could not be any cute or more perfect for this collection! I had a lot of fun layering up a few different pattern papers from the collection to make this fun layout! I also added a couple of strips of Bumblebee Dot/Stripe Petite Print paper to add a pop of yellow to the layout! 

Here are a few close ups of some of the details on the page:

The cute toucan from the odds and ends adds a fun splash of color to this layout! I loved how the stripes on the beak matched so well with the stripes of pattern paper that I used on the layout. I used the border strips found on the Safari Plaid paper. A couple of phrase stickers from the This and That Sticker Sheet helped bring in more color and interest.


This adorable monkey Doodlepop was the perfect little accent up in the corner. To add some fun texutre to the layout, I added some vine ribbon trim from my stash to have him swinging on. I also added a few palm leaves from the Odds and Ends and the "Hi Monkey" is from the This and That stickers.

I cut out a tag from the Animal Crackers paper and typed my journaling there. I tied some pretty blue Doodle twine to the tag. It makes a great visual triangle on the layout! 

One more cute monkey on a ribbon trim vine decorates the title block. He is from the Icon Sticker sheet.

My  title was made by layering up a sticker from the This and That sticker sheet, and a few leaves and a palm tree from the Odds and Ends. It's always fun to create little scenes around the title to make it stand out a bit more! 


This little layout was a joy to make and I always love using photos of the little ones enjoying the first times doing something exciting like going to the zoo! If you have a few zoo trip photos hanging around, pick up this amazing collection and use my layout as inspiration for your own Day at the Zoo photos! Thank you so much for stopping by today! We will see you next time - Happy Crafting! 


DOODLEBUG PRODUCTS USED:
At the Zoo Collection
Bumblebee Dot/Stripe Petite Print paper
Blue Doodletwine

OTHER PRODUCTS USED:
White Cardstock
Vine Ribbon Trim


Tuesday, July 30, 2024

Doodlebug Fun at the Park Travelers Notebook Projects

Hello there! I am so glad to be up on the blog today to share a couple of Travelers Notebook-sized layouts with you today! I am absolutely loving this size of memory keeping and knew right away I had some really fun photos of some recent  Disney trips I wanted to highlight! 

My first layout was made with loads of the fun embellishments from the collection. Chit Chat, Odds and Ends, and Icon stickers decorate the left page!  How cute are the pattern papers I used? The Magical  Show and Sweet Celebration papers from the 12x12 papers were great backgrounds for this colorful spread. 
On the right page, I cut some letters out with some red cardstock on my Silhouette and spelled the word Disney. I then decorated each letter with more embellishments from the collection.
This fun layout features some of my favorite photos - I am such a Disney Foodie! I love all the treats, meals, and snacks that Disney has to offer! So I knew I needed to make a layout especially when  I saw all the fun food icons in the collection! 
Here are a few close-ups of the left-hand page. I used a divided page protector which holds (8) 2x2 photos. I chose some of the squares from the Sweet Celebration paper as well as some papers from the 6x6 paper pad. The top square holds a cute shaker mix I made with some Mickey Heads and some glitter aqua stars. So fun! 
More close-ups of the squares. The cute faces on some of the treats from the Icon Sticker sheet had my heart and I added them to the bottom square. 

The right side of the layout holds a large picture which makes a great focal point for the theme of the layout. The bottom title was made with one of the labels from the Bits and Pieces and then I spelled out the "Let's Eat" using some Ladybug Alphabet Soup Puffy Stickers. 
If you are short on time this busy summer season but really would like to record some of your favorite Fun at the Park memories- give this size of memory keeping a try! I love sitting down with some pattern paper, embellishments, and photos and getting them into an album! It doesn't matter the size, Doodlebug has products to fit any size of memory keeping! Thank you so much for stopping by today! I hope to have inspired you to record all of your magical memories with the amazing Fun at the Park collection! We will see you next time! Happy Crafting friends! 


DOODLEBUG PRODUCTS USED:
Fun at the Park Collection
Ladybug Alphabet Soup Stickers
 Textured Red Cardstock

OTHER PRODUCTS USED:
Silhouette Machine
Travelers Notebook page protectors


Thursday, July 18, 2024

Hello there! I hope you are all having a wonderful summer so far! I am dreaming of a tropical vacation, and what better way to prepare for it than making a cute mini album to add all the pictures to! I made this super fun banner-shaped album and used the fun and summery "Seaside Summer" collection! 
To put this together I chose some of my favorite pattern papers from the collection and cut various banner sizes using my Silhouette. The smallest banner is about 2 1/2 x 4 inches and then I just added half an inch to both measurements to get the various-sized banners. 

As you can see, this little album is decorated up using all the different embellishments like the Chit Chat die cuts, the Bits and Pieces die cuts, and stickers galore!
The collection comes with the most beautiful color pallet and icons! How fun is this Toucan die cut, layered on a scallop circle die cut? Add a few circle photos and you have one cute page! 
This album is the perfect size for using the cute cut-apart cards in the collection like I did here. It's fun to layer up these cards like I did with stickers!
It's also really fun to add a pocket page to the album. Here is a great spot to tuck more cut-aparts, a journal spot, or 2 and more photos!
The last page is big enough to fit a 5x7 photo! I loved the palm tree die cuts so I had to add one on this page! 

Here's a fun, quick little walkthrough video short of the album! 

Thank you so much for taking some time out of your busy summer schedule to stop by today! My little album has inspired you to pull out some of your seaside adventure photos and make a quick little banner album like this one! Have the best day friends! Happy Crafting! 


DOODLEBUG PRODUCTS USED:
Seaside Summer Collection

OTHER PRODUCTS USED:
Silhouette Machine
Book Ring
Hole punch
Stitched Circle Metal Die


Tuesday, July 2, 2024

 Hello there and Happy 4th of  July to all my American friends! I hope your holiday is going well! Today I wanted to share my latest design team project with you! This is a quick and easy one to whip up for all your patriotic pals tonight! These fun treat holders will be the hit of your party! 


To make these, I took a snack-sized can of Pringles, emptied the chips, and rinsed the container. I then filled the cans with lots of 4th of July goodies like Poppers, some Pop Rocks candy, a Ring Pop, and a couple of party horn noise makers. These fit perfectly in this little container! 

To decorate the outside of the cans, I used a 4 1/2 x 10-inch piece of All Stars paper and covered the can. I then added a strip of Summer Celebration Washi Tape to the top edge. I then cut out a few different 3x4 cards from the Summer Celebration paper and glued them to the front of the cans. 

To decorate the tops of the cans, I used some blue tissue paper and wrapped it around the lid. I secured the tissue paper with some red and white stripe ribbon. I then added a few banner tags from the Chit Chat with the addition of a few stars from the Star Spangled Shape Sprinkles. These are hot glued to the center of the ribbon.


And of course, I couldn't resist using some of the adorable Doodle-Pops that come with the collection. I made these cute wands from a red and white striped straw that I topped with some of my favorite Doodle-Pops. These are mounted on a scalloped circle from the Nesting Scallops Doodle Cuts dies. I used the pretty Polka Dot Pride paper and some white cardstock to make these. I love how the Doodle-Pops fit just perfectly. I stuck these wands into the tissue paper.


I had such a blast putting these together and am excited to give them to my friends' children tonight at our neighborhood BBQ. I hope I have inspired you to make a few fun and festive treat holders for your festivities tonight! The Hometown USA collection is a perfect match for any patriotic party you are planning! Have a wonderful day and thank you for stopping by! Happy Crafting! 


DOODLEBUG PRODUCTS USED:
Hometown USA Collection
Nesting Scallops Doodle Cuts

OTHER PRODUCTS USED:
Pringles Cans
Candy and prizes
Tissue Paper
Ribbon
Paper Straws
Manual Die Cutting Machine